Changzhou Laizap Opto-Electro Technology Co., Ltd.
News

What Maintenance Practices Help Keep a Red Laser Level in Reliable Working Condition?

2026-11-20 0 Leave me a message

A Red Laser Level is a precision layout instrument used to establish horizontal and vertical reference lines during installation, alignment, renovation and construction work. Its usefulness depends not only on the quality of the laser source and self-levelling mechanism, but also on how carefully the instrument is handled, cleaned, stored and checked. Dust on the optical window, an unstable mounting surface, battery problems or an accidental impact can all affect day-to-day performance. Regular maintenance helps prevent avoidable interruptions and makes it easier to identify changes in performance before they affect an installation.


For contractors, installers and professional tool distributors, maintenance should be treated as part of normal equipment management rather than something to consider only after a problem occurs. Changzhou Laizap Opto-Electro Technology Co., Ltd. develops laser line projectors and laser levelling instruments for practical site applications. The company's product range includes red-beam models with different line configurations, power options and mounting arrangements. Understanding the operating limits and care requirements of each model helps users protect the instrument and obtain more consistent results over time.

Portable Red Plumb Dot Level For Indoor Decoration Use


Table of Contents


How Should You Clean the Instrument and Protect Its Optical Components?

Cleaning is one of the simplest maintenance tasks, but it needs to be carried out carefully. A laser instrument contains optical surfaces and precision components that should not be treated like the exterior of an ordinary hand tool. Dust, dried construction residue, fingerprints and fine particles can collect around the laser windows during regular site use. If these contaminants are left in place, they may make the projected line appear less clear or interfere with the user's ability to identify the reference line accurately. Cleaning should therefore focus on removing contamination without scratching or damaging the optical surfaces.

Before cleaning, switch off the instrument and place it on a stable work surface. Remove loose dust from the casing with a clean, soft, lint-free cloth. Pay attention to the area around the laser apertures, control buttons, charging port and mounting connection. These locations can collect fine particles, particularly when the tool is used in renovation environments where plaster dust, sawdust or masonry residue is present. Do not press hard against the casing or attempt to force debris into gaps around the controls.

The optical window requires more care than the outer housing. Use a clean lens cloth or another suitable optical-cleaning material to remove fingerprints and light surface contamination. If loose grit is visible, remove it gently before wiping. Rubbing a dusty surface directly can drag abrasive particles across the window and leave fine scratches. Avoid paper towels, rough fabric, abrasive pads and household cleaning products unless the manufacturer specifically confirms that they are suitable for the optical components.

Liquids should be used sparingly. Do not spray cleaning fluid directly onto the instrument. If an approved optical cleaner is required, apply it to the cleaning cloth according to the product instructions, rather than allowing liquid to run into the laser window, seams, switches or charging port. Strong solvents and aggressive detergents may damage plastic surfaces, seals or printed markings. When the correct cleaning method is uncertain, a dry optical cloth is the safer first step.

Changzhou Laizap Opto-Electro Technology Co., Ltd. offers models with an IP54 protection rating. This rating is useful when assessing the instrument's resistance to dust and water exposure, but it should not be interpreted as permission to wash the tool under running water or leave it exposed to heavy rain. IP54 indicates protection against harmful dust ingress and water splashing under specified test conditions. It does not mean that the housing is waterproof or suitable for immersion. After work in a damp environment, wipe the exterior with a dry cloth and allow the instrument to dry fully before putting it away.

Cleaning frequency should reflect the working environment. A tool used occasionally for indoor cabinet installation may need only a quick inspection after each job. Equipment used daily on building sites may require more frequent cleaning because airborne dust and handling marks accumulate faster. A practical routine is to inspect the optical windows before use, wipe the exterior after a dusty task and complete a more careful inspection before long-term storage. Avoid opening the housing to clean internal components. Internal optical alignment and electronic assemblies should be handled by qualified service personnel.

Users should also keep the accessories clean. Dust on a tripod platform, magnetic bracket or wall mount can affect how securely the instrument sits. Debris between the mounting surface and the instrument may cause a slight tilt or allow the tool to move during operation. Clean the contact surfaces, check that the mounting thread is free of grit and make sure the accessory is firmly secured before switching on the laser. The same principle applies to protective cases: loose particles inside a case can rub against the housing or optical windows during transport.

For routine site checks, use the following cleaning sequence:

  • Switch off the instrument before cleaning or inspecting it.
  • Remove loose dust with a clean, soft cloth or an appropriate gentle dust-removal method.
  • Wipe optical windows with a clean lens cloth, avoiding pressure and abrasive materials.
  • Keep moisture and cleaning fluids away from openings, buttons and charging connections.
  • Inspect the tripod interface, bracket and case for accumulated dust or grit.
  • Allow the exterior to dry before returning the instrument to its storage case.

These steps are straightforward, but consistency matters. Cleaning should not be postponed until the laser line becomes difficult to see. A clear optical window makes it easier to assess the projected line and identify unusual changes in appearance. It also reduces the chance that users will mistake surface contamination for a problem with the laser source. For a Red Laser Level used across multiple jobs, a short inspection before and after work is a practical way to maintain a clean optical path and protect the instrument from avoidable wear.


Which Handling and Storage Practices Help Prevent Mechanical Damage?

Mechanical damage is a common reason for changes in the performance of precision measuring equipment. A laser instrument may look intact after being knocked from a workbench, dropped onto a hard floor or carried loosely with heavier tools, yet an internal component may have shifted. The housing, pendulum assembly, mounting points and optical alignment all need protection from unnecessary impact. Good handling practices reduce the risk of damage and help keep the equipment ready for the next job.

Start by choosing a stable position before switching on the instrument. A tripod, platform or suitable bracket should be placed on a firm surface that is unlikely to move while measurements are being taken. Avoid placing the tool on loose boards, vibrating machinery, unstable ladders or surfaces that may be disturbed by nearby work. Even when the self-levelling mechanism is operating normally, movement of the support can change the reference position and lead to inconsistent layout marks.

Mounting compatibility is another important consideration. Different models may use different thread arrangements, so users should check the specification of the instrument before selecting a tripod or accessory. For example, the NK04DLP360 model uses a 1/4"-20 mounting thread, while the LP04DLP360 model supports both 1/4"-20 and 5/8"-20 connections. A compatible connection helps the tool sit securely. Do not force a mismatched screw into the mounting point, and avoid overtightening a compatible fastener. Excessive force can damage threads or place unnecessary stress on the housing.

During transport, use a suitable protective case rather than placing the instrument loose in a toolbox. A case helps limit contact with other equipment and reduces exposure to dust, moisture and accidental knocks. Keep heavy items away from the instrument, even when it is inside a bag. If the product includes a transport lock or another mechanism for securing moving internal components, follow the model-specific instructions for using it. Do not assume that every model has the same locking arrangement; check the supplied manual before operating any switch or lock intended for transport.

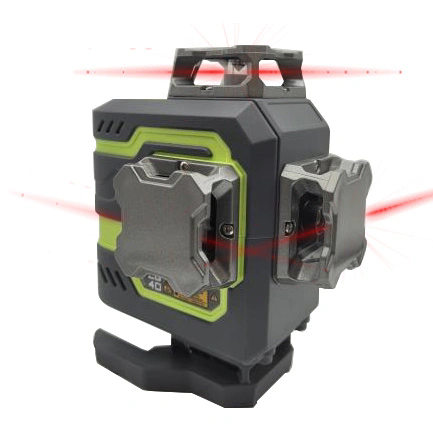
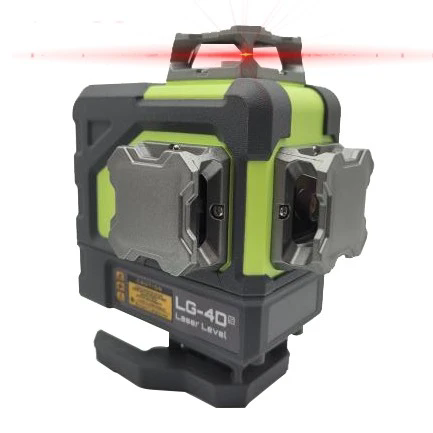
Changzhou Laizap Opto-Electro Technology Co., Ltd. produces several red laser configurations, including models with two horizontal and two vertical 360-degree lines. These instruments are designed for layout tasks in which the user needs reference lines across multiple walls or working planes. Their line configuration does not remove the need for careful positioning. Before starting a task, confirm that the mounting surface is stable, the instrument is within its self-levelling range and the projected lines are unobstructed. If the support moves after the initial setup, check the reference again rather than continuing from the original marks.

Temperature and humidity should also be considered during storage. The cited 4D red laser models specify a working temperature range of -10°C to +50°C and a storage temperature range of -20°C to +70°C. These limits are model specifications, not a recommendation to expose the tool to extreme conditions unnecessarily. Avoid leaving the instrument in a vehicle under direct sunlight for long periods, near heaters or in locations where temperatures can change rapidly. High temperatures can affect battery condition and electronic components, while condensation can form when a cold instrument is moved into a warm, humid environment.

When moving the tool between different environments, allow it to adjust before taking critical measurements if condensation or a significant temperature difference is present. Wipe away external moisture and wait until the instrument has reached a stable condition. Do not use a hair dryer, heat gun or direct heater to speed up the process. Rapid heating may damage plastic parts, seals or battery components. If moisture appears to have entered the housing, stop using the instrument and seek qualified inspection rather than attempting to dry the internal assembly yourself.

Storage should also include a simple accessory check. Inspect the tripod, bracket, magnetic base and other supplied mounting components for bent parts, loose fasteners or worn contact surfaces. A damaged accessory can make a properly functioning instrument appear unreliable because it cannot maintain a stable position. Keep the case closed when the tool is not in use, and avoid storing it with sharp metal objects, wet materials or loose fasteners that could scratch the housing.

A practical handling checklist includes:

  • Use a stable tripod or mounting surface suited to the job.
  • Confirm the mounting thread before attaching an accessory.
  • Do not force or overtighten mounting connections.
  • Protect the instrument from drops, impacts and strong vibration.
  • Use a protective case during transport and storage.
  • Keep the tool within the working and storage temperature limits specified for its model.
  • Inspect mounting accessories for looseness, wear or deformation.

These habits are especially important when equipment is shared among several workers. Assigning a designated storage location and recording any drop or impact can help prevent a damaged tool from being returned to general use without inspection. If the projected lines appear displaced after an impact, do not try to correct the issue by adjusting internal screws. The instrument should be checked against a reliable reference and serviced if necessary. Careful handling cannot eliminate every possible failure, but it can significantly reduce the mechanical risks associated with daily site work.


How Can Battery Care and Operating Conditions Support Reliable Performance?

Power management affects how consistently an instrument can be used throughout a working day. A low battery may interrupt a layout task at an inconvenient time, while poor charging habits can shorten the useful service life of a rechargeable battery. Users should understand the power configuration of the specific model, follow the supplied charging instructions and avoid treating all battery systems as interchangeable.

The 4D red laser models listed by Changzhou Laizap Opto-Electro Technology Co., Ltd. use different built-in lithium battery capacities. The NK04DLP360 is specified with a 7.4 V, 4000 mAh lithium battery, while the LP04DLP360 uses a 7.4 V, 2600 mAh lithium battery pack. Both models support USB charging. Their stated operating times also differ: the NK04DLP360 lists 12 hours in the first gear and 24 hours in the second gear, while the LP04DLP360 lists 6 hours and 12 hours respectively. These figures are model-specific reference values; actual runtime can vary with operating mode, battery condition, temperature and usage pattern.

Before a job, check the battery level and charge the instrument when needed. Avoid beginning a long installation with insufficient power, particularly when the work involves repeated alignment across several rooms or floors. Use the charging cable and power source recommended in the product documentation. A damaged cable, loose connector or unsuitable power adapter can cause unreliable charging. If the charging port becomes dirty, remove loose debris carefully without inserting metal tools or applying liquid to the connection.

Lithium batteries should not be exposed to excessive heat, crushed, punctured or disassembled. Stop using the instrument if the battery area becomes unusually hot, swollen, damaged or emits an unusual smell. Do not attempt to repair a built-in battery yourself. Follow the manufacturer's instructions for charging, storage and battery replacement, and use an approved service channel if the power system behaves abnormally.

For equipment that will remain unused for an extended period, avoid leaving the battery completely depleted. A very low state of charge maintained over a long period may contribute to battery deterioration. At the same time, long-term storage practices should follow the instructions supplied for the particular battery design. Do not assume that a removable battery should be detached or that a built-in battery should be charged to a particular percentage unless the manufacturer provides that guidance. Check the manual for the recommended storage condition and inspect the instrument periodically.

Operating conditions influence more than battery life. Dust, moisture, temperature, vibration and ambient lighting all affect the working experience. A red laser line is generally easier to see in indoor or controlled-light environments than in strong direct sunlight. Users should plan the layout process around the visibility of the beam rather than assuming that the same visual range will be available in every location. For the cited 4D models, the stated working distance is 30 m, with a range of up to 60 m when used with a compatible detector. The detector-assisted range should be understood as a specified operating capability, not a guarantee that the line will be equally visible to the naked eye at that distance.

When working in brighter environments or across longer distances, check whether the model supports pulse mode and whether the detector is compatible with that mode. Use the instrument according to its manual, because operating modes and detector compatibility can differ between products. Do not attempt to improve visibility by opening the housing or modifying the laser source. Such changes may compromise safety, performance and the product's original specifications.

Self-levelling conditions also matter. The cited 4D models specify a self-levelling range of 4° ±1°. The instrument should be placed on a reasonably level and stable support so that its compensating mechanism can operate within the specified range. If the base is tilted beyond the permitted range, the instrument may not establish the intended reference plane. Users should consult the model manual for the exact warning or indication method and should not assume that every model uses the same flashing or audible signal.

Laser safety must remain part of normal operating practice. The cited models are listed as Class 2 laser products with an output specification below 1 mW. Never stare directly into the beam, look into the aperture or deliberately direct the beam toward another person's eyes. Position the instrument so that the projected line does not create an avoidable exposure risk. Follow the product label, manual and applicable workplace safety rules, especially when working around reflective surfaces or in areas used by the public.

For day-to-day power and operating management, users can follow this routine:

  • Check the battery level before starting a long task.
  • Charge the instrument with the approved cable and a suitable power source.
  • Inspect the charging port and cable for visible damage.
  • Keep the battery away from excessive heat, impact and moisture.
  • Use pulse mode and a compatible detector when the model and working conditions require it.
  • Set up the instrument on a stable surface within its self-levelling range.
  • Follow the laser safety instructions and avoid direct eye exposure.

Battery care is not simply a matter of charging more frequently. It involves matching the power system to the work schedule, protecting the instrument from harsh conditions and responding promptly to unusual behaviour. If runtime becomes noticeably shorter, charging becomes inconsistent or the housing shows signs of battery damage, stop relying on the tool for critical work until the cause has been checked. A predictable charging routine and appropriate operating environment help keep the instrument available when accurate layout work is required.


When Should You Check Accuracy and Arrange Professional Servicing?

Cleaning and careful storage help protect an instrument, but they cannot confirm that its measurements remain within specification. A precision layout tool should be checked periodically, particularly when it is used frequently, transported between sites or relied on for work where alignment errors could cause rework. Accuracy checks help users distinguish normal operating conditions from a possible change in calibration, mounting stability or internal alignment.

The cited 4D red laser models specify an accuracy of ±3 mm at 10 m. This figure provides a reference for understanding the stated measurement performance under the conditions defined by the manufacturer. It should not be treated as a guarantee that every setup, surface or working environment will produce the same result. The stability of the tripod, the condition of the mounting point, the distance to the target and the method used to compare reference lines can all influence the observed result.

A basic field check can help identify an obvious change in performance. Choose an indoor location with a stable floor and a wall or other suitable reference surface. Set up the instrument at a consistent height, allow it to settle according to the operating instructions and mark the projected reference line. Rotate or reposition the instrument as directed by the model's checking procedure, then compare the resulting marks. The purpose is to identify a noticeable disagreement between reference positions, not to replace a formal calibration procedure.

Vertical alignment can be checked against a reliable plumb reference, while horizontal alignment can be compared using a suitable level reference or a controlled wall test. The method must match the instrument's line configuration and the instructions in its manual. Avoid using an uneven floor, a flexible support or a wall with an irregular surface as the only reference. If the test environment changes between readings, the comparison may reflect the setup rather than the instrument itself.

Changzhou Laizap Opto-Electro Technology Co., Ltd. publishes model-specific accuracy and operating information for its laser instruments. Users should refer to the relevant product documentation rather than applying one test procedure to every model. Different configurations may have different line arrangements, mounting threads, power systems and operating controls. If a field check produces an unexpected result, repeat it carefully after confirming that the support is stable and the instrument is operating within its specified conditions.

Several situations justify an accuracy check even if the instrument appears to work normally:

  • After a drop, strong impact or accidental knock.
  • After transport in conditions involving significant vibration.
  • When horizontal and vertical references appear inconsistent with a trusted reference.
  • Before a high-consequence installation where alignment errors could be costly.
  • When the instrument has been stored for an extended period.
  • When users notice an unexplained change in line position or self-levelling behaviour.

For equipment used regularly, a planned inspection schedule is more dependable than waiting for a visible problem. The appropriate interval depends on usage frequency, transport conditions, site environment and the importance of the work. Some professional users choose to include a periodic accuracy check in their equipment-management routine, while others arrange checks before major projects or after a known impact. Any formal calibration interval should be based on the manufacturer's guidance, workplace quality requirements or the applicable measurement procedure rather than an assumed universal rule.

Users should not attempt internal calibration by turning adjustment screws or opening the housing without approved service instructions. The laser source, compensating mechanism and internal optical components are precision assemblies. An adjustment made without the correct procedure or reference equipment may make the result less reliable. If the instrument fails a field check, shows unstable lines or cannot establish a consistent reference, remove it from critical work and contact qualified service personnel.

It is also useful to distinguish between an accuracy problem and a setup problem. A loose tripod head, damaged mounting thread, uneven platform or accidental movement can shift the projected line even when the internal measuring system remains within specification. Before assuming that calibration has changed, inspect the support, mounting connection and working surface. Check that the instrument is within its self-levelling range and that no one has disturbed the setup. If the same discrepancy remains after the setup has been corrected, further inspection is appropriate.

Keep a simple maintenance record for equipment used by several people or across multiple sites. The record can include the model, serial or asset number, date of inspection, cleaning completed, battery condition, field-check result and any impact or repair history. This information helps identify recurring problems and makes it easier to decide when professional servicing is needed. It also prevents workers from relying on memory when a tool has passed through several users.

When arranging service, provide a clear description of the issue. Note whether the line is consistently displaced, whether the problem occurs only at a particular distance, whether the instrument has suffered an impact and whether the battery or controls show unusual behaviour. Include the model number and relevant operating conditions. This information can help the service provider determine whether the issue is related to calibration, mechanical damage, power supply or another component.

A maintenance programme should therefore combine visual inspection, basic field checks and professional servicing when necessary. Cleaning protects the optical surfaces; careful handling reduces the risk of internal damage; battery management supports reliable operation; and accuracy checks help confirm whether the instrument remains suitable for the task. These measures are complementary. None should be treated as a substitute for the others.


Conclusion

Reliable performance depends on a consistent maintenance routine rather than a single cleaning or calibration task. Keep the optical windows clean, protect the housing from impact, use compatible mounting accessories, manage battery charging carefully and store the instrument within the specified temperature range. Check accuracy after an impact, following extended storage or whenever the projected reference appears inconsistent. Changzhou Laizap Opto-Electro Technology Co., Ltd. provides model-specific product information that users should consult when confirming operating limits, mounting arrangements and maintenance procedures. If you need a suitable instrument for a particular layout application or want to confirm the specifications of a model, contact the company to discuss the working conditions and product requirements before making a selection.


Frequently Asked Questions

1. How often should a laser instrument be cleaned?

Inspect the optical windows before use and remove dust or fingerprints whenever they are visible. After work in a dusty environment, wipe the exterior and check the mounting connection before storage. Equipment used on busy construction sites may need cleaning after each shift, while tools used occasionally indoors may require less frequent attention. Always use a soft cloth for the housing and a suitable lens cloth for optical windows. Avoid abrasive materials and unapproved solvents.

2. Does an IP54 rating mean the instrument can be used in heavy rain?

No. IP54 indicates a defined level of protection against dust ingress and water splashing, but it does not mean that the instrument is waterproof or suitable for immersion, pressure washing or prolonged exposure to heavy rain. Keep the tool protected from unnecessary moisture. If the exterior becomes wet, wipe it dry before storage. If water may have entered the housing, stop using the instrument and arrange an inspection.

3. What should I do if the projected line appears inaccurate after the instrument has been dropped?

Stop using it for critical alignment work and carry out a field check using a stable setup and a reliable reference. Inspect the mounting point and accessories to rule out movement or physical damage. If the line remains inconsistent, contact qualified service personnel. Do not open the housing or adjust internal calibration screws without the manufacturer's approved procedure and suitable reference equipment.

4. Can I leave a rechargeable instrument connected to power for long-term storage?

Long-term charging and storage practices should follow the instructions for the specific battery system. Do not assume that leaving the instrument continuously connected to a charger is appropriate. Avoid storing a lithium battery in a fully depleted condition for an extended period, and keep the instrument away from excessive heat. Check the product manual for the recommended storage and charging procedure, especially if the equipment will remain unused for several months.

5. Why should accuracy be checked even when the laser lines look clear?

A clear, bright line does not by itself confirm that the projected reference remains within the instrument's stated accuracy. Optical visibility and measurement accuracy are different considerations. An instrument may produce a clearly visible line even if an impact, unstable mounting point or internal change has affected alignment. Periodic field checks and additional checks after drops or unusual handling help identify problems before they affect installation work.

Related News
Leave me a message
X
We use cookies to offer you a better browsing experience, analyze site traffic and personalize content. By using this site, you agree to our use of cookies. Privacy Policy
RejectAccept